What She Order, Fish Filet?

The title seemed appropriate given that this has been stuck in my head and sea bass was on the King menu.

For once, I decided not to do fish tacos (because I’ve had WAY too many carbs swimming around in my tummy lately). Instead, I wanted fish and pasta and tomatoes. But what to do when I didn’t want any more processed carbs? Zucchini and squash!

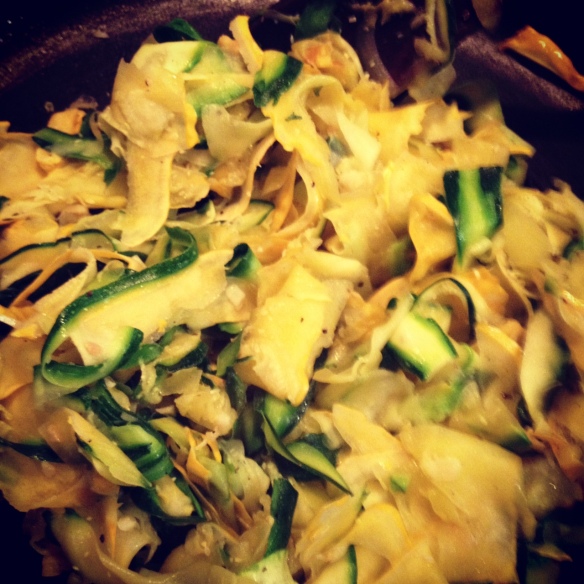
Yep, there’s a hella easy way to use up that excess zucchini and squash that doesn’t involve baking: faux pasta. It’s simple, it tastes just as substantial as pasta, but without all the guilt. Topping it off with some roasted tomatoes and nectarines (inspired by a recent trip to River and Rail, have you guys made your reservations yet?!) is a great, summery take on the classic pasta and tomato sauce. Sea bass holds up well, with a crispy exterior and a moist, fatty, almost meaty texture on the inside. But, any white fish could be just as good here. I opt to treat fish simply–just some salt and pepper, perhaps a little lemon. Quality fish doesn’t need much else.

The side here was just sweet potato fries: slice sweet potatoes into matchsticks of desired thickness, coat in olive oil, sprinkle with 1/2 to 1 tsp. garam masala (a classic Indian spice), drizzle with honey, and season with salt. Bake at 400 degrees for 35 minutes, flipping halfway through.

Roasted Tomatoes and Nectarines (serves: 2, with some leftovers)
Note: I prefer to use a mix of tomatoes, both in size and in taste. For this, I used cherry, Roma, zebra, and golden tomatoes. It’s just much prettier in presentation. Nectarines are perfect with tomatoes; remember, both are fruits.
1 lb. assorted, fresh tomatoes, quartered if they are larger (no need to cut the cherry tomatoes)
1 to 2 nectarines, sliced into 1-inch chunks
Olive oil
Salt

Heat oven to 400 degrees. Coat the bottom of a glass casserole dish or roasting pan with olive oil. Add the tomatoes/nectarines, drizzle with more olive oil, and season with salt. Roast for 35 minutes, stirring halfway through.

Zucchini and Squash “Pappardelle” (serves: 2)
1 to 2 cloves garlic, peeled and minced
3 small or 1 large zucchini
3 small or 1 large squash
Olive oil
Salt
Pepper

Heat over medium low enough olive oil to coat the bottom of a saute pan. Meanwhile, using a mandoline or a vegetable peeler, slice the zucchini and squash into thin ribbons (mimicking the look of pappardelle; you’ll end up with about 4 cups). Add the minced garlic to the saute pan and cook for about 2 minutes. Add the zucchini/squash mixture, drizzle with more olive oil, and season with salt and pepper. Cook, stirring occasionally, for about 15 minutes.

Grilled Sea Bass (serves: 2, with leftovers)
Note: A thinner white fish could be used here; just reduce the grilling time.
1 lb. sea bass (our fish peeps remove the skin, but skin-on is fine), cut into 2 to 3 strips
Olive oil
Salt
Pepper

Season the fish with salt and pepper. Heat over medium high enough olive oil to coat the bottom of a grill pan. When heated, add the fish and grill for about 20 minutes. (You want the exterior to be crunchy and golden.) Place over the zucchini/squash “pappardelle” and top with the roasted tomatoes and nectarines.

A Day in Training (and Food)

I’ve been MIA because, honestly, I haven’t really cooked anything the past few days that hasn’t already appeared here. So, I’m going to change directions for today because some have asked how I fuel for distance training (and I’m totally kidding–no one’s asked that, but I wanted to write about it, so there you go).

Fueling for endurance sports can be intimidating if you bother to read any number of articles. Since I don’t have a degree in nutrition and can’t even begin to figure out the ratio of carbs to protein to fat to…everything that’s going to sustain me during my training, I’m just going to write about my everyday nutrition. (Yeah, nutrition. I’m not on a diet. Seriously, I will slap the next person who says, “Oh Mindy? She’s on a diet.” No, I’m not. I’m not sure how you even diet when you’re doing endurance sports. I just eat right. That’s it. End of discussion.) Again, this is what works for me during a typical weekday. I’m not an elite athlete. I have a desk job. This is just what I know won’t make me heave in the middle of a tempo track workout. What’s going to be okay on my stomach if I’m slugging out 7 miles in 90-degree weather.

You’ll see below that I’m basically a 33-year-old baby with feeding times. I am constantly eating. Anyone who walks by my office? Guarantee that you’ll find me eating and/or chugging water. But, aside from a daily bagel, nothing in here is processed or refined.

5:35 a.m. (or earlier depending on what time our cat sticks her paw in my nose, on my face, or in my ear, her way of saying, “OhmygodI’mgoingtodieifyoudon’tfeedmenowit’sbeenlike11hourssinceyou’vefedmeFEEDME,” which then triggers the beagles to go all schizo and start running around the bed because “Ohmygodwe’veNEVERbeenfedFEEDMEPETMEFEEDME”): Up to, obviously, feed the pets. If I have a shorter run of 30-35 minutes, I may get up even earlier to do that run, especially during the summer.

7:45 a.m.: After checking email, etc. at work, fill up my water bottle so I can start getting my first few cups of the day. I try to have two bottles finished off by the time I leave for lunch. (No, I do not drink coffee. I’m not sure how anyone does. Neither do I drink any sodas or energy drinks, ever.) Start on my first “breakfast” of the day, which is now a fruit smoothie (recipe below, you’re welcome, it’s fantastic).

8:30 a.m.: Eat first serving of whole fruit (depends on what’s in season at the market, but usually an apple is in here somewhere).

9:30 or 10 a.m.: Second serving of whole fruit.

12:45 p.m.: Lunch at home, which is usually a salad with veggies and 2-3 oz. of protein (usually fish for shorter runs and chicken for longer runs). More water.

1:30 or 2 p.m.: Another serving of whole fruit.

2:15 p.m.: A tablespoon of crack. Not the illegal kind. The peanut butter kind. Athletes in this area know this stuff. It’s gold in a jar. It’s made by the 91- or 92-year-old mom of a local farmers market vendor. We go through a jar of this stuff each week, maybe more because sometimes you find the jar of PB in one hand, a spoon in the other, and you just let nature take its course. Ten minutes later, you realize you’ve eaten half of the jar. This is literally the only PB we eat now. We are total PB snobs.

2:30 p.m.: This is my favorite time of day: BAGEL TIME! I go through a lot of bagels, but it’s usually the only bread product I eat during the day, unless I’m really starting to fuel for an upcoming race. I opt for either a whole wheat bagel or a cinnamon raisin bagel. Also? I’m now determined to start learning how to make my own bagels. For now, I buy them at a local store that sources them from a local bagel company. It’s also right around this time I’m making sure I’ve gone through another bottle of water and am starting into my last (fourth) bottle at work.

5 p.m.: Head out for my workout. This really depends on the day/week my coach has scheduled for me. Right now, it varies from 20+ miles a week to 35+ miles a week, so it really fluctuates. It could be a cross-training day, too, which is a lighter load, or some core/ab workouts. As far as nutrition goes during my weekday runs, I just bring along a sports bottle filled with water to stay hydrated. For me, runs that are less than 60/65 minutes don’t really require anything more than that.

7 p.m.: Back home and usually sitting down for dinner around this time. Because I eat more fruits than anything prior to my workout, and I get my biggest carb boost 2.5 hours prior with my bagel, dinner is really about catching up on the whole vegetables I need, maybe some grains, and 2-3 more ounces of protein, which helps rebuild muscle after exercise. And that’s usually how dinner breaks down: 2 or 3 servings of some combo of veggies/grains with a few ounces of meat.

Saturdays are typically my longer run days and require a little change-up in my nutrition plan. On those days, I usually start off with a bagel and a glass of water. I then carry plenty of liquids with me on my run since I’m out longer than 60 minutes. After my run, I head straight to our farmers market and hit up one of my favorite new booths that specializes in raw foods. The folks there know me now and know I’m going for one of their smoothies, which typically comprises a tea (of the green variety from what I can tell), blueberries, bananas, and greens. Yes, greens. Whatever, it tastes great, and it is by far the best recovery drink I’ve had. It’s usually at the same booth that I pick up a post-run snack since I’m usually recovered enough to know I’m hungry. If I have a particularly long run (like the 2 hours and 15 minutes I did last week, hello 14.5 miles which are WAY different than 13.1 miles), I may plan to meet my husband at a local restaurant for some brunch, which is usually an egg wrap loaded with vegetables and some potatoes.

So, there you go. And as a reward for sitting patiently through my food ramblings, I now present a great smoothie recipe.

Blues and Bananas Smoothie
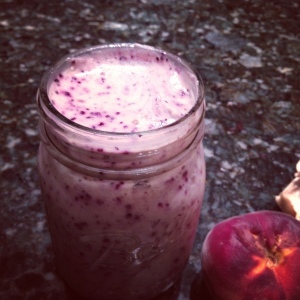
Note: If you prefer to use fresh fruit, just add a few cubes of ice during the blending process.

1 frozen banana (peeled, obviously)

3/4 c. frozen blueberries

3/4 c. milk (I prefer raw, but whatever you have on hand)

1/2 c. plain yogurt (again, I use raw from a local vendor, but Greek yogurt is comparable here)

1/2 Tbsp. honey

1/4 tsp. salt

Put everything in your blender or food processor, pulse a few times, then blend until smooth and creamy. I make this the night before so it’s ready to go in the morning.

Mini-Shrimp Boil

Image

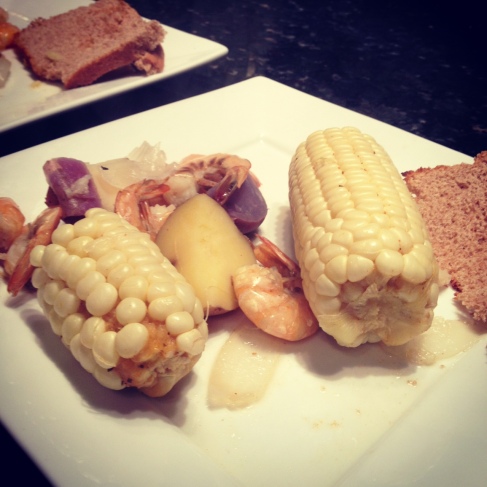
Shrimp boil? Good. Shrimp boil the evening before running 14.5 miles? Um, not the best idea in the world. Now that I’ve whet your appetite, I promise the food was totally tasty the evening before. Just, you know, save it for a time when you’re not doing something ridiculously taxing the next day.

What’s great about a mini-shrimp boil like this (meaning it’s only going to serve 2-3 people and not some massive gathering that requires the customary newspaper spread out, although those are equally good, but we never have anyone over, so really shrimp and all the accoutrements thrown on a newspaper in our dining room would just be kinda sad) is that it’s a one-pot deal. Excluding your cutting board and knife. It’s a mess to eat, yes, but not to fix.

I went simple and opted for the traditional onions, potatoes, corn, and shrimp. As far as the shrimp go, you really don’t want to use the peeled variety as the shells give this boil additional flavor. Just don’t eat the shells when the food’s done. Or do. Whatever floats your boat.

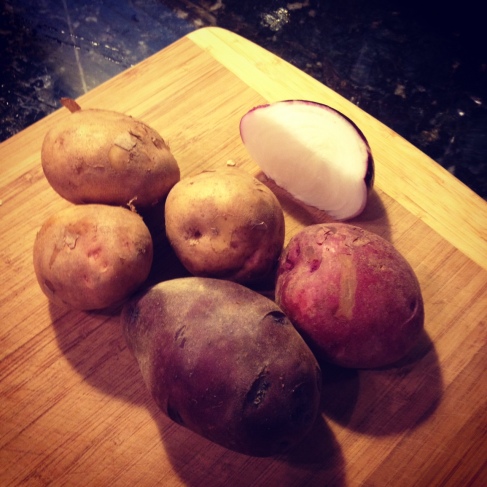
For the potatoes, I used a mix of Yukon gold, new, and adirondack blues. (FYI, the blues ended up looking like some morphed version of poi, which, I’m sorry, but that shit’s disgusting. Yes, I’ve tried it. I loved Hawaii, I did. You introduced me to fish tacos. You’re super chill. But seriously? Poi? And Spam? Is there some lack of gelatinous crud in your diet that you feel you need to eat these things? Because I’m genuinely curious.)

Image

Mini-Shrimp Boil (Serves: 2 or 3 if you have a third wheel hanging around your house)

3 c. stock (I used a homemade, no-salt-added chicken stock, but whatever you have on hand should work fine. Just adjust the seasoning as needed. I’m a control freak when it comes to salt, so I prefer to be able to add it as necessary.)

6-7 c. water

1-2 Tbsp. Cajun, blackening, or Old Bay seasoning

1/2 tsp. cayenne (Or, if you’re like me, about a teaspoon after you realize, crap, that’s not blackening seasoning in my hand. Oh well, we’ll clean our sinuses out tonight.)

1 Tbsp. salt

1 yellow onion, peeled and roughly chopped

2-3 garlic cloves, peeled and smashed

1/2 to 1 lb. potatoes, washed and quartered

2 ears of corn, shucked and cut in half

1/2 lb. medium-sized shrimp, heads removed

Hot sauce

Butter (I’m a cilantro-lime butter addict now, but use what you prefer.)

Bring the stock, water, seasoning, cayenne, salt, onion, and garlic to a boil over high heat in a large stock pan. Reduce heat to medium high and add the potatoes and corn. Let boil for 30-35 minutes, or until the potatoes spear easily with a fork. Add the shrimp (which takes no time at all to cook, so they’re always the last to go in) and boil for another 10 minutes, or until the shrimp are coral in color.

Plate up with a good piece of bread and salad, and serve with hot sauce, butter, plenty of napkins, and a bowl for the discarded shrimp shells.

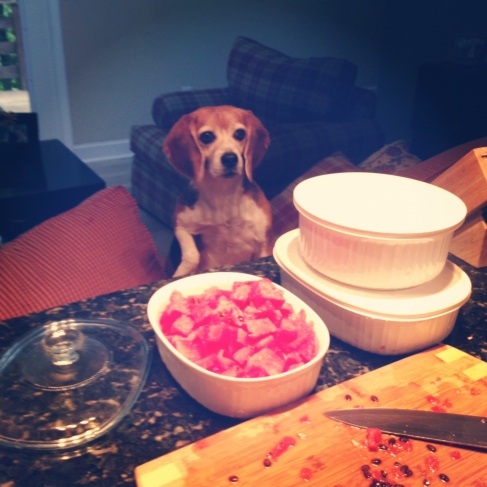
For dessert, nothing beats fresh, cold watermelon. Especially if you’ve dumped too much cayenne into your boil and topped it all off with habanero hot sauce. Also? Beagles f-in love watermelon, no matter what Wes Anderson claimed.

Image

Fun to say, just as easy to make: Gazpacho

Gazpacho. It just sounds fun, right? Even better? It’s simple. I’m talking 10-15 minutes of simplicity. And it doesn’t require heat, which is a bonus in this jungle-like weather we’re experiencing lately. (Which hasn’t exactly stopped me from cranking the oven up to roast a chicken. I’m a gluttonous sadist like that sometimes.)

I don’t remember the first time I had gazpacho, but I know it wasn’t in a restaurant. I know I made it, and I believe I used a recipe from Joy of Cooking. I’ve since found you don’t really need a recipe for this. The bases of gazpacho are innumerable; there are versions utilizing day-old bread or avocado, versions topped with ceviche, others enhanced with stock. But, when local markets such as ours are rife with heirloom tomatoes, cucumbers, and peppers, I say go with the tried and true, the simple and classic.

As long as you prep your mise en place (which is just a fancy way of saying you have all of your shit together and ready to go), this takes no time at all.

The start of prepping mise en place.

This is taking fresh, local ingredients, giving them a rough chop, and throwing them in the food processor. (Which isn’t to say the culinary history of gazpacho is simple. As with all foods, I encourage anyone interested in cooking to conduct a little research into what it is they are fixing, particularly if the food’s roots are found within another food culture. A little extra education never hurt anyone–unless it involves educating yourself about something illegal, in which case, nevermind–plus I guarantee you’ll discover new ways to utilize ingredients or enhance a meal.)

Because I’m also a sucker for fresh corn during the summer months (just ask my husband who is probably about two weeks shy of asking me when I’m going to stop using it so much), I served grilled corn on the cob as a side. (If you leave some husk intact, it makes for a more rustic presentation, or just a handy way to grab the corn and tear into it, so really it’s fancy and utilitarian.)

Simple Gazpacho (serves: 2, with some leftovers)

Note: You can really alter the presentation of gazpacho depending on the color of tomatoes you utilize. I’ve used all red tomatoes here, hence the bright red presentation. Obviously if you use yellow tomatoes or ripe, green tomatoes (such as zebras), you’ll have a corresponding color presentation and a different taste. Likewise, you can use orange or yellow bell peppers instead of the green and red used here. If you want a thicker consistency, add day-old bread, roughly chopped. Or, you know, save the bread (um, preferably a fresher loaf) to serve on the side.

7-8 medium-sized heirloom tomatoes, cored and quartered

1/2 medium red onion, peeled and roughly chopped

1/2 to 1 roasted red bell pepper (I made a batch of these a day or two prior, so I really wasn’t counting this step. So, I totally lied to those of you without roasted red peppers on hand. No worries, though–simply roast whole or halved peppers drizzled with olive oil and seasoned with salt in a 400-degree oven for about 40 minutes, flipping halfway through. Afterwards, place in a paper bag and let cool. When cool enough to handle, remove the charred skin, which should slip off easily at that point. Feel free to bitch about how I said earlier this whole thing takes 10-15 minutes to throw together. Whatever–just take it as a lesson to always have roasted red peppers on hand. Seriously, they pep up other soups and are great on salads or egg sandwiches. Or in omelets. You know what? We’re even now because of all the extra meal ideas I just gave you, so no bitching.)

1 medium cucumber, seeds removed and roughly chopped

1 medium green bell pepper, seeds and ribs removed and roughly chopped

2-3 garlic cloves, peeled and roughly chopped

2 Tbsp. tarragon vinegar (sherry or red wine vinegar could be subbed here)

1 Tbsp. olive oil

2 tsp. salt

3-4 dashes hot sauce or 1 roasted jalapeno (optional)

In a food processor or blender, pulse all ingredients until desired consistency is reached. (I prefer a smoother soup, so I pulsed this about 30 times. If you like it chunkier, pulse less.) Taste and season with more salt as needed.

Grilled Corn with Cilantro-lime Butter

Olive oil

2 ears of fresh corn, husks peeled back and silk removed (husks should remain intact if you want a more fresh-from-the-farm look)

Cilantro-lime butter (I’ve cheated and used butter from a terrific vendor at our market, but you could make some at home by smashing chopped fresh cilantro and lime zest into softened butter. Or, you could use an herb such as rosemary or oregano with lemon zest. It’s butter. You’re not going to screw it up if it’s of good quality to start. That means no margarine. Seriously. Chuck it and get real butter.)

Heat over medium high enough olive oil to coat the bottom of your grill pan. Place the corn on the grill with the husks slightly draped across the side to avoid burning. Grill for about 15-20 minutes, rotating the corn every few minutes so each side makes direct contact with the grill pan. (And yes, there will be much popping occurring in your kitchen with the corn placed directly on a hot surface. Don’t worry, though; after the first one or two times, you’ll get used to it and stop yelling, “What the hell was that?!” It’s fine, relax. Or, if you want to avoid a possible coronary, pull the husks back up around the corn after you’ve de-silked the ears and let soak in water for about 30 minutes prior to grilling. Me? I like to be kept on my toes in the kitchen.) Remove, plate up, and serve with the cilantro-lime (or other flavored) butter.

Twisting Classics: Julia Child’s Roast Chicken with Grilled Grits Cakes and Peaches

For lovers of all things food, whether professionals or home cooks, Julia Child (who would be celebrating her 100th birthday next month) is one of those models of excellence. To me, she’s simply a class act and represented all I wanted to become: a chef who came into her own at a not-so-tender age, confident, striking, bold enough to get on TV and suggest that if you drop a chicken just pick it up and move along (if the guests aren’t in the kitchen, they won’t see your mistakes). She also inspired some of my favorite “Cosby Show” scenes during which Cliff Huxtable would mimic her unique timbre.

I envied, and still do, Julia’s life as a cook, and I still look to that classic French cookbook for guidance (even reading the section about how to properly handle a knife worked wonders).

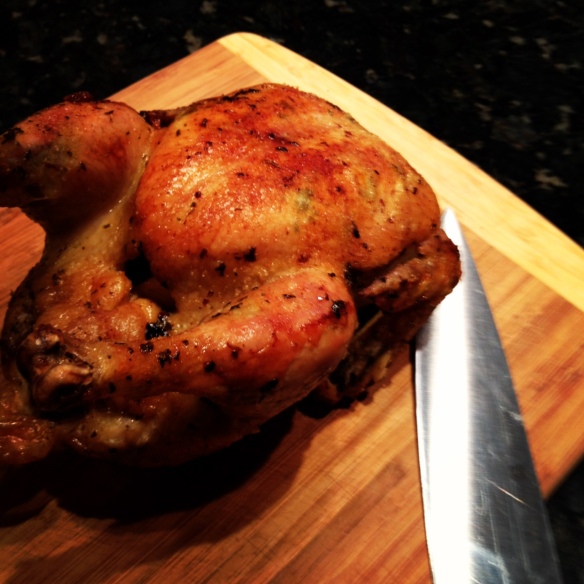
By now, that cookbook automatically falls open to one section: roast chicken. It’s a butter-spattered page, one well used. I think it was Anthony Bourdain (or maybe I just like attributing most culinary wisdom to him because he’s just as equally inspiring as Julia: everyone needs a little devil on their shoulder dropping the f-bomb once in a while in the kitchen) who once said that all home cooks should learn to roast chicken. And for good reason. When done right, it’s just simple perfection (although I admit my love of roast duck now exceeds my love of roast chicken). It’s versatile in that leftovers can be used for myriad purposes (sandwiches, soups, etc.). And really, it’s not a difficult meal to master. For the sake of full disclosure, yes, my roasting has resulted in quite a few dry chickens in the past, but that’s because I would always doubt myself. The trick here is one I follow when making anything involving yeast: just go into it sure of yourself. Be confident, be cocky. Success will happen, and the reward is slices of juicy chicken dripping with fat and oil, all surrounded by a perfectly salted, crispy skin. What more could you want?

Now, I’ve tried other roasted chicken methods. There are tons out there. But none–none–beat the Julia Child method. Yes, it requires extensive time at the stove (we’re talking more than an hour), but it’s a small sacrifice to pay. And yes, maybe this recipe is more suited to cooler, fall-like temperatures, but screw it. I want chicken, I fix chicken. The recipe involves flipping, basting, and (ugh) math. But don’t freak out. Just grab a pen and paper and write all the necessary times down in advance, using it as a checklist. (I’m sorry, I majored in communications, my brain is just automatically geared to hate numbers.) It beats the hell out of getting 30 minutes into the process and forgetting if you have another
10 minutes, or are you supposed to flip after this? Shit, I should have taken notes. So just, you know, take notes from the start.

I’ve labeled this entry “twisting classics” because the original recipe uses butter and oil with only salt sprinkled and butter smeared in the chicken cavity. (Yep, if you’re squeamish just reading the term “chicken cavity,” you’re not going to last long in this process because it involves the use of a whole chicken, not those sanitized chicken breasts. Just get over it and be thankful you didn’t have to cut the chicken’s neck and de-feather it.)

I’m not sure if what I’ve done here would make dear Julia roll over in her grave, but I did it anyway. I used cilantro-lime butter and stuffed the cavity with a cut lemon. I also added fresh, whole jalapenos during the roasting process in lieu of the traditional carrots (and to supplement an onion). I’m sorry Julia, I am, but if you tried the final result, you couldn’t possibly be upset with me. This was make-you-wanna-slap-your-mama-it’s-so-good chicken. (And I don’t know why you’d want to slap your mom if something is good, but there you have it.)

Technically, I can’t reprint the recipe because I don’t have permission from the publisher, and I didn’t adapt the recipe enough to really claim such. So, you know–go buy the cookbook. You’ll get your money’s worth with the roast chicken recipe alone, trust me. But don’t be afraid to change it up, as I’ve done. Add a lemon or even an orange or quartered apple in the chicken cavity (after salting and smearing with butter, of course). Try out a flavored butter (the cilantro-lime version can be made by smashing fresh cilantro
and lime zest into softened butter). Add veggies other than onions and carrots. Try out the jalapenos if you like some heat or toss in red peppers for a milder bite. But, above all, do not overcook your bird. If you’re at all hesitant, things will go wrong. Follow the cooking
times prescribed in the cookbook, bearing in mind that, as I’ve found, a chicken that has been purchased from a local farm (e.g., not stuffed to the gills with antibiotics) cooks faster than its less fortunate grocery store kin. (Yes, even if the fresh chicken has been previously frozen.) I used about a three-pound bird I purchased from a local farm (Weathertop Farm), so I opted for a 1:10 total roasting time. Eagle-eyed readers will note my “cheat sheet” says 1:20, but I backtracked because it’s always easier to stuff the
bird back in the oven to undergo some additional roasting than it is to recover
from a dried-out chicken.

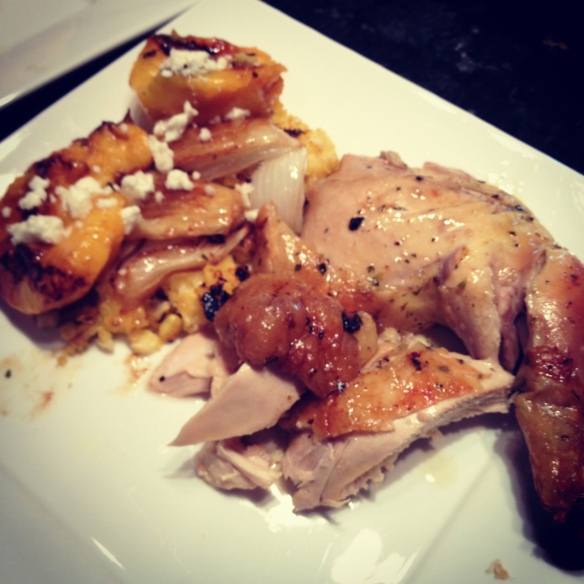
Now, I can include my recipe for grilled peaches and grits cakes topped with feta, roasted onions, and honey. I’ve become fond of grilled fruits, especially peaches, which pair well here with the roasted onions and the creaminess of the grits. Remember my catfish n’ corn from the previous night? I made enough grits so that I could have some leftover for this meal. A simple way to use up leftover grits, as I’ve done here, is to pour them into a glass baking dish (I used an 8×8 dish), press the grits down into the pan to mold to its shape, then pop in the fridge to chill and set overnight. The next day, just slice and grill. They’re great topped savory or sweet, for breakfast, lunch, brunch, or dinner.

Grilled Peaches and Grits Cakes with Feta and Honey (serves: 2)

Olive oil

2 ripe peaches, peeled

4-5 slices of grits cakes (see above method)

Roasted onions (these were roasted with the chicken, but you could easily roast whole onions for about 40-50 minutes in a 400-degree oven)

Fresh feta (I prefer locally made, but whatever you have available)

Honey

Over medium high, heat enough olive oil to coat the bottom of your grill pan. Add the grits cakes on one side of the pan, the peaches on the other. Drizzle both with more olive oil. Grill about 8 minutes per side, or until grill marks form. Plate the grits cakes, top with the roasted onions and peaches, crumble over some feta cheese, and drizzle over some olive oil.

Fish Taco: Redux

Told ya fish tacos are on heavy rotation around here.

So, I’ll make this simple. I made the same basic fish taco as last time, except this time I used blueberry salsa. And you guys? New favorite. I may never go back to regular salsa again.

The blueberry salsa just made this pop–the tartness was perfect. This isn’t a sweet salsa. It’s savory one, but the blueberries still provide a hint of natural sweetness and stand up well to the fish and roasted jalapenos. Give it a go and let me know what you think.

Blueberry Salsa

1/2 c. fresh blueberries (if you use frozen, just thaw them first)

1/4 red onion, chopped

3-4 dashes hot sauce (preferably habanero)

Handful of fresh cilantro

Salt and pepper, to taste

Pulse all ingredients in a food processor until the ingredients come together (I chose to leave this a bit chunky).

See? Easy as pie. Easier than pie, really. I’m not sure why people think pie is easy to make. Anyway, you could add jalapenos to this, but I prefer whole roasted jalapenos as a separate “layer” of a fish taco. The salsa could easily accompany tortilla chips, roasted chicken, a hearty grilled cheese sandwich, or even a good burger.

The whole taco shebang.